Showing posts with label cakes. Show all posts

Saturday, January 28, 2012

My Dragon New Year Fondant Cake


Every Chinese New Year, I remember my mother-in-law always telling me that there should be a sweet dish as our dessert on the table so that the new year will bring the sweetness in our life and she always makes sweet snow white fungus dessert (see recipe here: http://coffeeliqueurrecipes.blogspot.com/2007/01/sweet-snow-fungus-dessert-with.html?showComment=1230676020000#comment-c4327047256211051078). I love the dessert so much, but unfortunately, it's not easy to find the ingredients here in Philippines.
So, to welcome the new water Dragon Year, I decided to make my own dessert: Dragon New Year Fondant Cake.

I used 4 ready-made mini round sponge cakes with 3 different tastes (melon, yam, and pandan) to be decorated. The decorations are all made of marshmallow fondant that I made by myself. I like to use the marshmallow fondant better than the commercial fondant I bought from the store because marshmallow fondant tastes better.

A day before I started to decorate the cakes, I made the toppers first. I made 2 dragon faces, 2 mandarin oranges, 2 golds, and 2 Chinese character for Fu (Good luck symbol), but I only took photo of 1 Fu. I hand-shaped everything by myself, except for the Dragon mane. I used a star-shape cookie cutter.

On the day I decorated my cakes, I started at around 8 o'clock in the morning by creating the Dragon cake. For the Dragon cake, I used 2 sponge cakes; 1 cake is for the head and the other one I divided into 3 pieces to make up the long body of the Dragon. For the tail, I used marshmallow fondant that I hand-shaped.
The main color of the Dragon is red. But since I made my own red fondant, the redness is not too bright like the commercial red fondant. The secondary color for the Dragon is yellow. I hand-shaped the body after I covered the sponge cake with fondant. Before the sponge cake was covered with fondant, I spread the pineapple jam that I made to 'glue' the fondant to the cake. I prefer to use the jam instead of icing cause the jam will enhance the taste of the cake. If I use icing, the original taste of the cake would be gone.

The Dragon cake was the hardest to make for me. But once it's done, the other 2 cakes were really a piece of cake! :-D

The second one I made was the Fu cake. I used pandan sponge cake that I spread with pineapple jam all over it. I covered the cake with red fondant, made the top smooth, then I cut the extra fondant cover on the side of the cake. I put the Fu topper that I 'glued' with water. Then I started to roll a long yellow fondant, cut into same portions and shaped it into small balls. I put the small balls around the cake.

And then, the last cake was the New year table cake. I used melon-taste sponge cake. Just like the other cakes, the first layer was the pineapple jam, then the next layer was the red fondant. This time, instead of cutting all extra fondant on the side of the cake, I shaped the extra fondant to make it look like a table cloth. Then I put 2 mandarin orange toppers on top of the cake and a Fu topper. I also put 2 golds on the side of the 'table', and it's done! The next thing to do was to take good pictures of my creation... :-)

I completed my work at around 4 o'clock in the afternoon with 2 times stop in between to cook breakfast and lunch.
When my 3 year old daughter saw the completed Dragon cake, she was so excited she wanted to eat the cake right away. I told her to wait for 1 day until the New Year came. So, on the new year day, she woke up so early and got all excited to eat the Dragon cake. She took out the cake, put it on the table, and enjoyed it. She was more interested in eating the decorations instead of the cake. She gave the cake to her daddy, and  she ate the decorations.


Now the cakes are all gone. This was my 3rd time using marshmallow fondant to decorate a cake.
I will post more stories about my fondant cake creations when I have more time, especially for my 2nd fondant cake, which was my son's 7th birthday cake. In the meantime, you can read the story about this birthday cake here: http://coffeeliqueur.blogspot.com/2011/12/my-sons-angry-bird-7th-birthday-party.html

Thursday, June 01, 2006

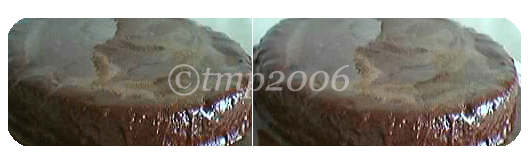
Strawberry Jam Chocolate cake

This is the 2nd version of the chocolate cake. This is the one with the strawberry jam.

Ingredients:
1 1/4 cups (155 gr) self-raising flour, sifted
1/2 cup (125 gr) caster sugar
1/2 cup (60 gr) cocoa powder
1/3 cup (40 gr) icing sugar, sifted
1/4 cup (80 gr) strawberry jam
125 gr butter
2 eggs, lightly beaten
1 tsp vanilla essence
1 tsp bicarbonate soda
1 cup (250 ml) milk
  1. Preheat the oven to moderate 180oC (350oF). Grease the base and sides of a deep 20cm square/round cake tin and line with baking paper.
  2. On a big bowl, beat butter, caster sugar, and icing sugar with electric beaters until mixture is light and creamy. Add the eggs gradually, beating throroughly after each addition.
  3. Add vanilla essence and strawberry jam and beat until combined.
  4. Using a metal spoon, fold in the combined sifted flour, cocoa, and bicarbonate soda alternately with the milk.
  5. Stir until the mixture is just combined and almost smooth.
  6. Pour into the tin and smooth the surface.
  7. Bake for 45 minutes or until a skewer (I normally just use a fork) comes out clean when inserted into the centre of the cake.
  8. Leave in the tin for 15 minutes and cool on a wire rack.
  9. After the cake is completely cool, turn over and put the cake into a plate.

Chocolate Cake


There are 2 versions of chocolate cake, one is without some strawberry jam and the other one is with some strawberry jam. It's up to you. But this post will only talk about the chocolate cake WITHOUT the strawberry jam.

Ingredients:
1 1/2 cups (185 gr) self-raising flour
1/2 cup (60 gr) plain flour
1 1/2 cups (375 gr) caster sugar
250 gr butter, chopped
200 gr dark chocolate, chopped into small pieces
2 eggs, lightly beaten
1/3 cup cocoa powder
1 tbsp instand coffee powder
1 tbsp oil
1 cup (250 ml) water
  1. Preheat the oven to 160oC (315oF). Grease a deep 20 cm round cake tin and line with baking paper.
  2. Sift the flours and cocoa powder into a large mixing bowl and make a well in the center.
  3. In a pan, combine the butter, oil, chocolate, sugar and coffee powder with the water. Stir over LOW heat until the chocolate and butter are melted and the sugar has dissolved. It is very important to use low heat so that your mixture will not be burned.
  4. Pour into the well in the mixture of sifted flour and cocoa powder (no. 2).
  5. Whisk until combined. Add eggs and mix well, but do not overbeat.
  6. Pour the mixture into the tin and bake for 2 hours or until a fork comes out clean when inserted into the center of the cake.
  7. Leave in the tin to cool completely, then turn over the cake out of the tin and put it on the plate.

Wednesday, April 26, 2006

Banana-raisin Cake


My son loves to eat banana for his breakfast. I don't know if this is because he was born on the monkey year (chinese calendar)... :) I hope not... :D
Just like other 18months old toddler, he sometimes will eat more than 1 banana in a day but some other time, he won't eat at all.
I always have to buy banana at least twice a week. I normally buy a semi-ripe banana so that I can keep it longer. But sometimes, the bananas have become over-ripe even before my son eats them all and no one is going to eat them anymore.
So, rather than throwing them out into the rubbish bin, I use the over-ripe banana to make everyone's favourite banana cake.
I mix and match the recipe from a wonderful recipe book I have "Cooking - a commonsense guide" from family circle series.

Here is the recipe:
To make the banana cake, for the best result, you need to use some ripe bananas. The ripe bananas will give a very nice banana fragrance to your cake.

125 gr butter
1/2 cup (125 gr) caster sugar
2 eggs
1 tsp vanilla essence
1 1/2 cups (360 gr) mashed ripe banana (I normally use all over-ripe bananas that I have)
1tsp bicarbonate soda
1/2 cup (125 ml) milk
2 cups (250 gr) sifted self rising flour (I normally use wheat flour)
2 tbsp Sultanas raisins

To make the banana cake:
1) Preheat the oven t0 180oC (350oF).
2) Grease a 20 cm (8 inch) round cake tin and line the base with baking paper.
3) Lightly beat the 2 eggs.
4) Using electric beaters, beat the butter and sugar until light and creamy.
5) Add the eggs gradually, beating well after each addition.
6) Add the vanilla essence and mashed banana, and beat until combined.
7) Dissolve the bicarbonate of soda in the milk. Using a metal spoon, fold in the sifted flour alternately with the milk.
8) Add the Sultanas raisins, stir until all the ingredients are just combined and the mixture is smooth.
9) Spoon into the round cake tin and smooth the surface.
10) Bake for 1 hour or until a fork comes out clean when inserted into the centre of the cake.
11) Leave the cake in the tin for 10 minutes before turning out onto a serving plate.

Voila! Now you have a very delicious banana-raisin cake. Enjoy your cake!
My son loves my banana cake so much.